Setting Up Super Mario Game on Kubernetes (Kubeadm)

Introduction: In this tutorial, we'll embark on an exciting journey of setting up the classic Super Mario game on Kubernetes. Leveraging the power of AWS and Kubernetes, we'll create a Kubernetes cluster using Kubeadm. Get ready for a nostalgic adventure in containers and cloud orchestration!
Tools Involved:
AWS (Amazon Web Services)
Kubernetes
GitHub: https://github.com/Aman-Awasthi/k8s-mario
Steps:
1. Setting up Kubernetes Master and Worker Nodes: We need a properly configured Kubernetes cluster to kickstart our Super Mario Kubernetes deployment. This involves setting up both the master and worker nodes. The master node orchestrates the cluster, while the worker nodes execute the game's components.
2. Launching EC2 Instances with User Data Script: The infrastructure backbone for our Kubernetes cluster will be Amazon EC2 instances. We'll launch two EC2 instances and use a user data script to streamline the Kubernetes configuration and installation process. Below is an example user data script:
#! /bin/bash
sudo apt update -y
sudo apt-get install -y apt-transport-https ca-certificates curl
sudo apt install docker.io -y
sudo systemctl enable --now docker
curl -fsSL "https://packages.cloud.google.com/apt/doc/apt-key.gpg" | sudo gpg --dearmor -o /etc/apt/trusted.gpg.d/kubernetes-archive-keyring.gpg
echo 'deb https://packages.cloud.google.com/apt kubernetes-xenial main' | sudo tee /etc/apt/sources.list.d/kubernetes.list
sudo apt update -y
sudo apt install kubeadm=1.20.0-00 kubectl=1.20.0-00 kubelet=1.20.0-00 -y
This script ensures that the EC2 instances are provisioned with the necessary dependencies, Docker, and the correct version of Kubernetes components.
3. Creating Manifest Files for Deployment and Service: Kubernetes uses manifest files to define the desired state of applications within the cluster. For Super Mario, we'll create manifest files specifying how the game should be deployed and how it should be exposed to the outside world. This step ensures seamless interaction with the game from external sources.
Steps -
Launch two EC2 t3.medium instances with user data script


Master Node Configuration:
Initialize the Kubernetes Master Node
- Initialize the Kubernetes master node using Kubeadm:
sudo kubeadm init

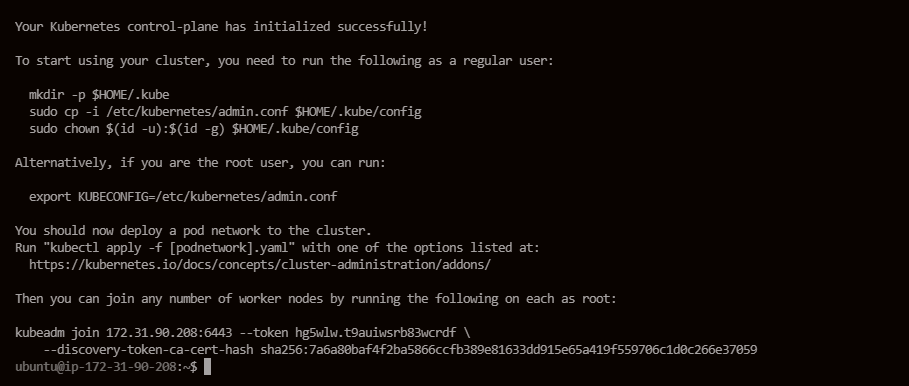
Set Up Local kubeconfig
- Create the necessary directories and copy the kubeconfig file:
mkdir -p $HOME/.kube
sudo cp -i /etc/kubernetes/admin.conf $HOME/.kube/config
sudo chown $(id -u):$(id -g) $HOME/.kube/config

Apply Weave Network
- Apply the Weave network to enable network communication between nodes:
kubectl apply -f https://github.com/weaveworks/weave/releases/download/v2.8.1/weave-daemonset-k8s.yaml

Generate Token for Worker Nodes
- Generate a token that worker nodes can use to join the cluster:
sudo kubeadm token create --print-join-command

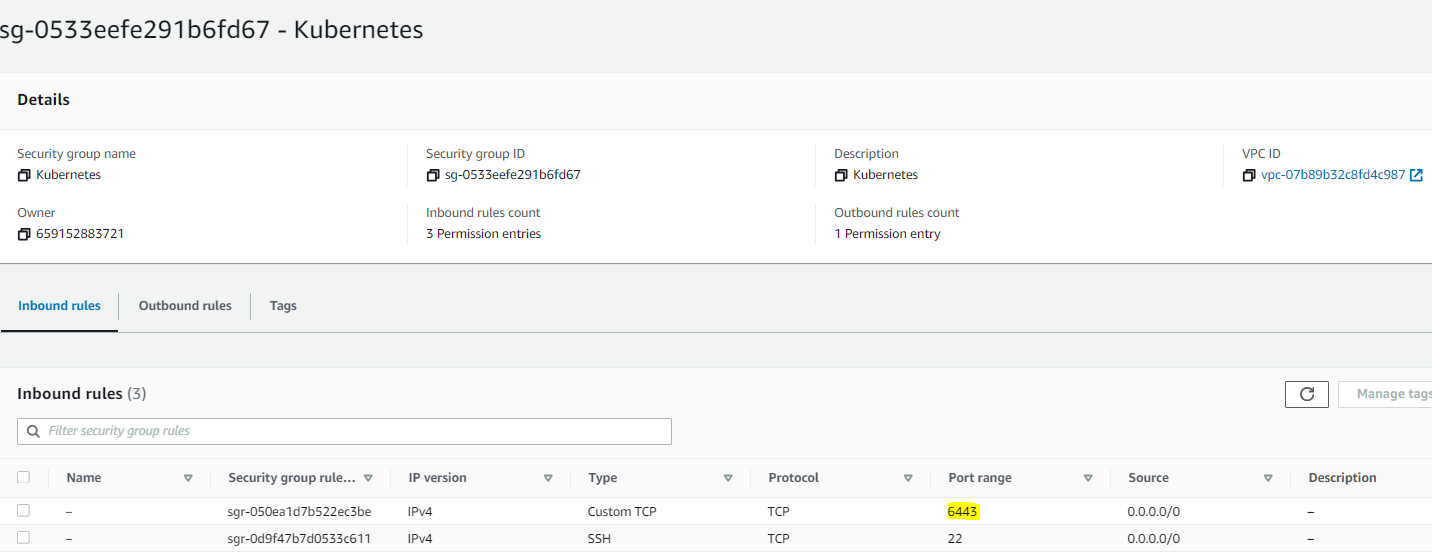
Expose Port 6443
- Ensure that port 6443 is exposed in the security group of the master node to allow worker nodes to connect.
Worker Node Configuration:
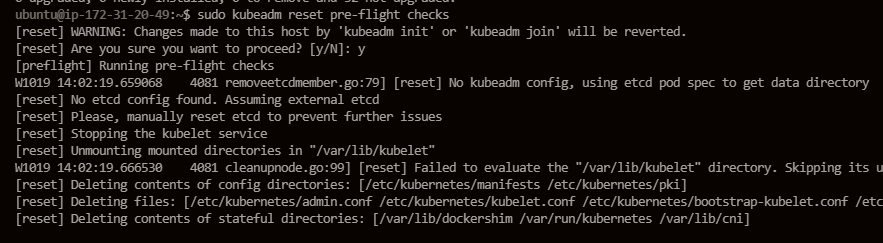
Worker Node Initialization
- On the worker node, run the following command to reset pre-flight checks and join the cluster using the join command provided by the master node. Append
--v=5to get verbose output. Make sure you are working as a sudo user or use sudo before the command:
sudo kubeadm reset pre-flight checks
<insert the join command from the master node here> --v=5


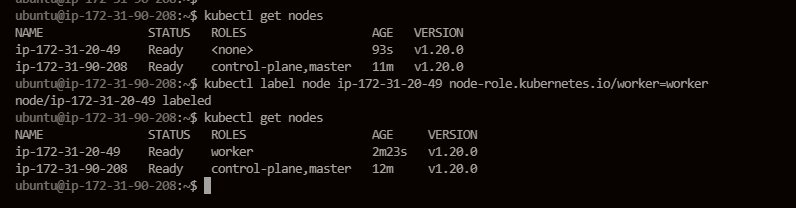
Verify Cluster Connection
- On the master node, check if the worker node has successfully joined the cluster:
kubectl get nodes
Node Labeling
- If you want to label worker nodes for specific roles (e.g., labeling a worker node as a worker), you can use the following command:
kubectl label node <node-name> node-role.kubernetes.io/worker=worker
Setting up Manifest files -
deployment.yml -
apiVersion: apps/v1
kind: Deployment
metadata:
  name: mario-deployment
spec:
  replicas: 2  # You can adjust the number of replicas as needed
  selector:
    matchLabels:
      app: mario
  template:
    metadata:
      labels:
        app: mario
    spec:
      containers:
      - name: mario-container
        image: sevenajay/mario:latest
        ports:
        - containerPort: 80
services.yml -
apiVersion: v1
kind: Service
metadata:
  name: mario-service
spec:
  type: NodePort
  selector:
    app: mario
  ports:
    - protocol: TCP
      port: 80
      targetPort: 80
      nodePort: 30008
Apply Manifest configuration files -
kubectl apply -f deployment.yaml -f services.yml
Our application should be accessible at port 30008 as mentioned in the deployment file.


Perform the cleanup once you are done with the project.
Thank you :)


